Installing an LED display has two parts: the physical mounting and cabling, and then setting up the control system from a computer or phone. This guide walks through the order in plain language, from hanging the screen to the first image and from loading the scan file to the management apps that send content. Detailed steps for Huidu and NovaStar are on separate pages.
Short answer: Installing an LED display has two parts: the physical mounting and cabling, and then setting up the control system from a computer or phone. The order is preparation, mounting, power and data cabling, first power-on, scan file, screen connection, then content and settings. Have a licensed electrician connect the power supplies.
Setup order at a glance
Preparation: Confirm the size, the load-bearing wall or frame, the power line and service access.
Mounting: Level the frame and fit cabinets or modules without gaps and on the same plane.
Power cabling: Have a licensed electrician connect the power supplies to an earthed, properly fused line.
Data cabling: Daisy-chain the network cables from the controller to the receiving cards in the planned order.
First power-on: Power up and connect your computer or phone to the controller by cable or Wi-Fi.
Scan file: Load the receiving-card configuration (scan) file for your module, test it and save it permanently to the cards.
Screen connection: Define the receiving-card order in the software and check that the image sits correctly across the screen.
Content and settings: Send content with the management app, set brightness, schedules and time, and back up the configuration.
Before installation: location, power and access
Most of the installation is planned before the screen arrives. The wall or steel frame must carry the screen's weight safely; outdoors, wind and rain must be considered too.
Decide early whether the screen will be serviced from the back or the front. Rear-service screens need working space behind them; front-service modules make installs close to a wall easier.
Screen size and pixel pitch should match the viewing distance.
Prepare an earthed, fused power line rated for the screen's total load.
Know where content will come from (computer, media player, USB stick, phone).
Plan ventilation so that heat can escape from enclosed housings.
Physical mounting
The supporting frame or wall profiles are levelled first. Cabinets or modules are fitted from the bottom up, with no gaps or height steps between them. Even a small step shows up as a line or shadow when the screen is on.
Modules usually carry an arrow or label on the back showing the data direction. All modules must face the same way; a module fitted the wrong way round shows a scrambled image.
Power and data cabling
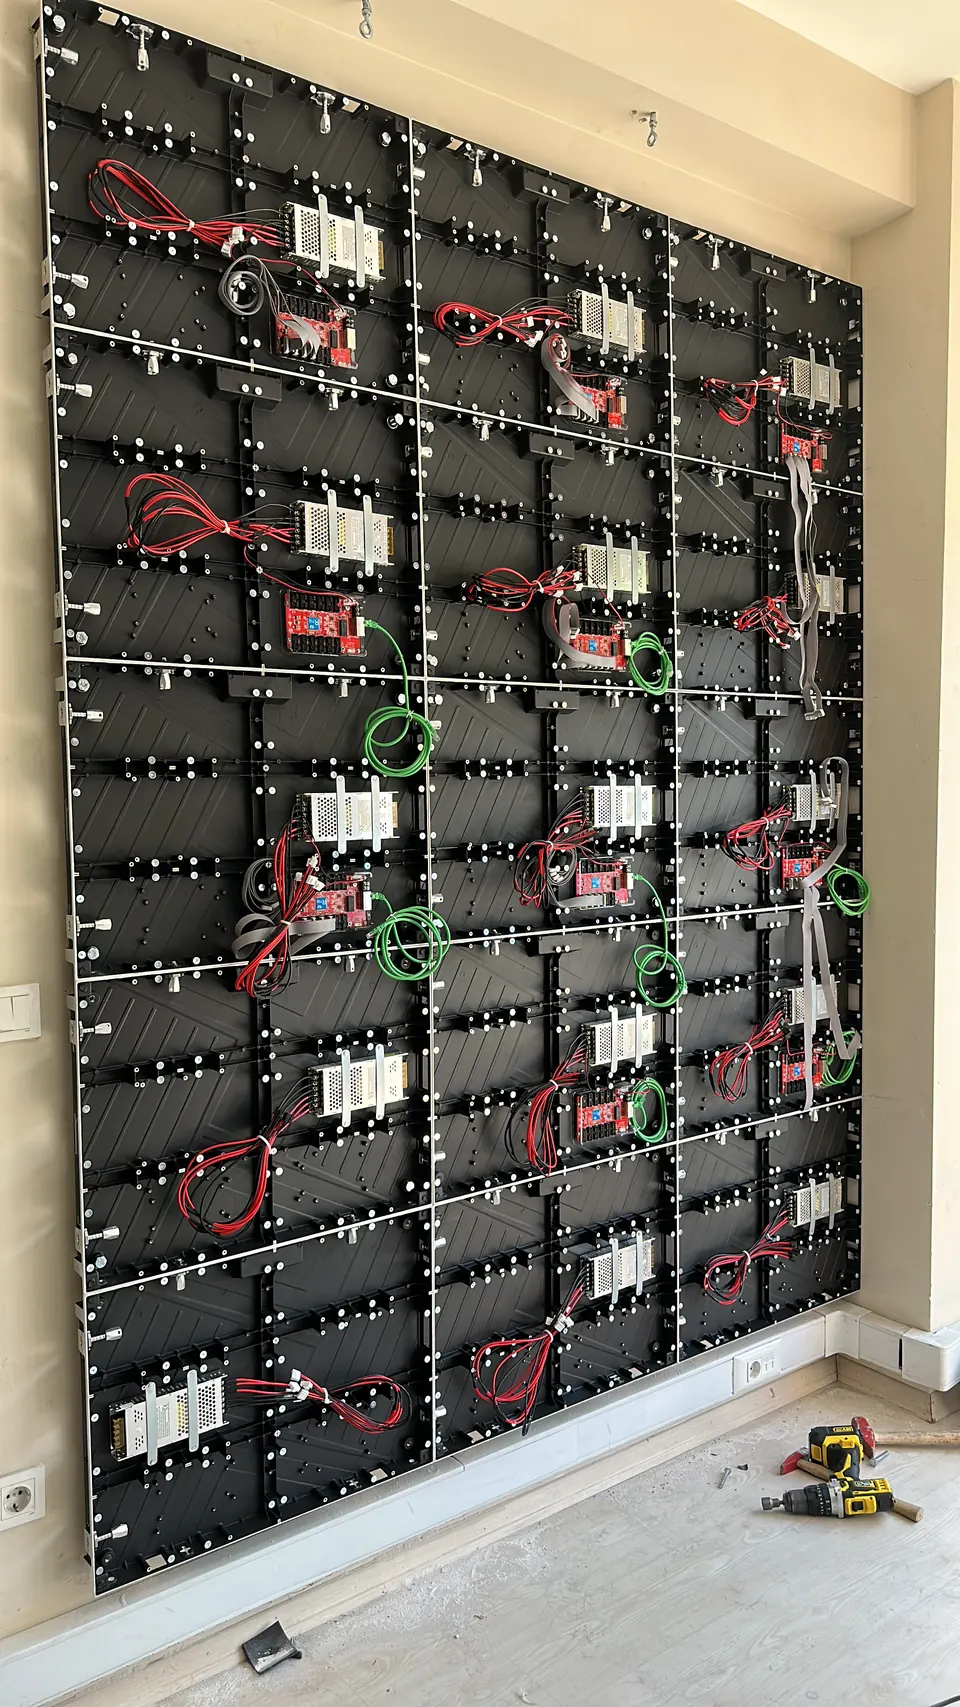
Each cabinet or module group has a power supply and a receiving card. Power supplies connect to the mains and modules connect to the power supplies. The electrical connection must be made by a licensed electrician, with earthing and a line fuse.
On the data side, the network cable from the controller (or sending card) goes into the first receiving card, then on to the next, forming a chain. Sketching where this chain starts and which way it runs makes the software's “screen connection” step much easier. The flat data cables between the receiving card and the modules must also be fitted the right way round.
Control system: synchronous or asynchronous?
In a synchronous system the screen shows the image of the connected computer or video source in real time. When the source switches off, the image goes too. It suits stages, conference halls and live broadcasts.
In an asynchronous system the content is loaded into the controller's memory in advance, and the controller plays it on its own schedule even when the computer is off. It is common for shops, façades, signs and menu screens. Some devices support both modes and can switch between them.
ARLEDSCREEN projects use Huidu, NovaStar and Colorlight control systems. The setup logic is the same for all three; what changes is the software name and its menus.
First power-on and the scan file
When power is first applied it is normal to see scrambled lines, a split image or wrong colours, because the receiving card does not yet know the module. Once the settings file that tells the receiving card how to drive the module is loaded, the image comes right.
In the field this is usually called the “scan file”. It holds the module's pixel count, scan type, driver chip and data direction. On NovaStar systems it is the receiving-card configuration file (.rcfgx or .rcfg). On Huidu systems it is loaded in the receiving-card parameters of the hardware settings, either by choosing a ready module file or by running the step-by-step “smart setting”.
After loading, use the test patterns (solid colours, grid, grey levels) to check that every module lights correctly. Sending the settings is not enough; they must be saved to the cards so they survive a power cut. Ask the company that supplied the screen for the correct file and keep a copy.
Screen connection: card order
The scan file makes each module work correctly on its own. The position of each cabinet on the screen is set in the software's screen connection: the number of receiving-card columns and rows and the order the cable runs. If this step is wrong, each cabinet looks fine on its own but pieces of the image swap places.
Management apps: desktop and mobile
Once the screen is configured, day-to-day use needs a content management app. These apps prepare video, images, text and clocks, send them to the screen and schedule playback. Brightness, scheduled blanking and time sync are set here too.
For Huidu, HDPlayer is used on the desktop and the LedArt app on the phone. For NovaStar, NovaLCT handles screen configuration, ViPlex Express (Windows) and ViPlex Handy (Android and iOS) handle content, and the VNNOX cloud platform handles remote management. Detailed steps are in the two guides below.
After installation
Before handover, set brightness for the environment, plan a lower level for night and sync the device clock. Back up the configuration files and programmes, and change the management passwords from their factory values. Remember that a replacement module must run with the same scan file as the original.
Common mistakes
Fitting modules in different directions: the data arrows must all point the same way.
Loading the scan file of a similar-looking module: the file must match your model and driver chip.
Sending the settings but not saving them: the screen reverts after a power cut.
Connecting to an unearthed line or one that cannot carry the screen's load.
Leaving the computer's display resolution below the LED screen's (synchronous systems show a cropped image).
Leaving the factory-default Wi-Fi and management passwords unchanged.
Frequently asked questions
How long does LED display installation take?
It depends on the size, the mounting method and whether the frame is ready. Once mounting and cabling are done and the correct scan file is at hand, the software setup is usually short; without a file, the smart-setting steps can take longer.
What is a scan file and where do I get it?
It is the settings file that tells the receiving card how to drive the module, and it is module-specific. Ask the company that supplied the screen or module. Without a file, the smart-setting wizard in Huidu and NovaStar software can build one step by step while you watch the module.
Do I need a computer to manage the screen?
On asynchronous systems everyday content changes can be made from a phone app (LedArt for Huidu, ViPlex Handy for NovaStar). The initial scan file and screen connection setup usually needs a Windows computer.
What is the difference between Huidu, NovaStar and Colorlight?
All three are control lines ARLEDSCREEN installs and configures. Their prices are not on the published panel list; they are confirmed in a written quote. Huidu is common for asynchronous signage and Wi-Fi or USB content; the desktop app is HDPlayer and the phone app is LedArt. NovaStar is used for higher pixel loads and stage or synchronous work; screen setup is NovaLCT, content is ViPlex Express and ViPlex Handy, and remote management is VNNOX. Colorlight X and VX processors and S-series senders are for synchronous and multi-source jobs; configuration uses iSet or the web interface. The right line is confirmed at survey from the source type and screen size.
What is the difference between synchronous and asynchronous screens?
A synchronous screen shows the connected source in real time and goes blank when the source is off. An asynchronous screen keeps content in its own memory and plays it on a schedule, independently of a computer.
Can an LED screen be hung from the ceiling?
Yes. Indoors, an LED screen can be hung from the ceiling with a suitable frame and suspension system. Whether the ceiling and hanging points carry the screen weight is checked during the survey; the suspension detail is written into the quote.
Do I need scaffolding or a crane for installation?
It depends on mounting height and screen size. Low indoor walls usually need only ladders or a platform; high façade and pole installations need scaffolding, a boom lift or a crane. This is decided at the survey and shown separately in the quote.
How much space does an LED screen installation need?
Screen size is planned in multiples of the 320 × 160 mm module. Front-service systems can be mounted close to the wall; rear-service systems need access space behind the screen for maintenance. Required depth and clearance are measured on site.
What electrical supply does an LED screen need?
The screen must be on an earthed line with a breaker sized for its power. For large screens, three-phase (R-S-T) distribution is recommended to balance the load. Peak and average power are calculated from screen area and stated in the quote.
Can an LED screen replace my existing sign?
Yes. If the existing structure is sound and the size fits, the LED screen can go in the same place. The structure is checked at the survey for screen weight and, outdoors, wind load; it is reinforced if needed.
Do I need a municipal permit for an outdoor LED screen?
Outdoor advertising screens may need a permit from the local municipality. The screen owner applies to the relevant municipal office; screen size, location and mounting details may be requested. These technical details are included in our quote.
ARLEDSCREEN helps with mounting, scan-file loading, software setup and technical service. Share your screen size and controller model and we will get back to you.
This guide was written in our own words using the manufacturers' official manuals and download pages. Menu names and passwords can vary by software or device version; follow your device's manual.